Konova

Showing posts with label Android. Show all posts

Monday, November 4, 2013

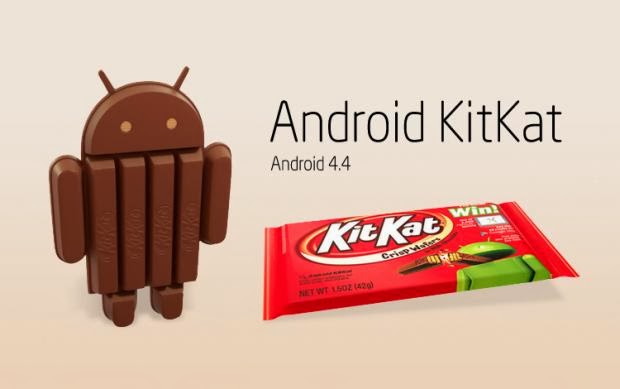
[HOW-TO] - Update and Install Android 4.4 KitKat on your Google Nexus 7 (2013)


Preparatory Steps
  • Ensure that you have the original USB cable for your Nexus 7 (2013). However, a duplicate might also work
  • Charge your device to at least 85% so it doesn’t turn off during the Android 4.4 installation
  • Enable USB debugging on your Nexus 7 (2013) by going to Settings > Developer Options > USB debugging
  • Make sure you have all the USB drivers installed on your computer to support your device
  • After you’ve completed all the prepatory steps, make the following downloads

Downloads

Steps to Install Android 4.4 KitKat on Google Nexus 7 (2013) (CWM Recovery method)

Step 1 - After you’ve downloaded the above listed zip files, connect your computer to your  Nexus 7  and move both the zip files to your phone’s root storage (in plain sight, not in any folder)
Step 2 - Now disconnect your device and boot it into recovery mode by first turning it off and then on again by pressing Volume Up + Volume Down + Power buttons together
Step 3 - Now that you’re in CWM recovery, select Data Wipeout / Factory reset option and wipe the data. Next, select the Wipe Cache and then Dalvik cache from the Advanced Option
Step 4 - Now go back to the recovery menu and select the Install Zip from SD Card option. Now choose the Android 4.4 AOSP zip file and install it. After that completes, do the same for the GApps zip file and install it.
Step 5 - After that’s done, select the +++Go Back++++ option and click on Reboot system now 

Steps to Install Android 4.4 KitKat on Google Nexus 7 (2013) (TWRP Recovery method)

Step 1 - After you’ve downloaded the above listed zip files, connect your computer to your nexus 7 (2013) and move both the zip files to your phone’s root storage (in plain sight, not in any folder)
Step 2 - You may now disconnect your device and boot it into recovery mode by first turning it off and then on again by pressing Volume Up + Volume Down + Power buttons together
Step 3 - Now that you’re in CWM recovery, select Data Wipeout option and wipe the data. Next, select the Wipe Cache and then Dalvik cache from the Advanced Option
Step 4 - Now go back to the recovery menu and select the Install option. Now choose the Android 4.4 AOSP ROM zip file and install it. After that completes, do the same for the GApps zip file and install it.
Step 5 - After that’s done, go back to the recovery menu and click on Reboot 
You have now successfully updated your device to the latest Android 4.4 KitKat firmware. 
Source: Droidcave.

Tuesday, September 24, 2013

[HOW-TO] - Nexus 7 (2013) One Click Toolkit for Mac OS X (Lock, Unlock, Root, Unroot)


Toolkits for Mac OS are not easy to find. Most root/unroot/lock/unlock utilities are meant for PC users. I found this utility here to assist me in rooting my Nexus 7 (2013) LTE Model which I recently purchased.

These toolkits will allow you to root, install TeamWin Recovery, unlock bootloader, and lock bootloader. All with a simple click of a button for your Nexus 7 2013 model!

 How Do I Use These Toolkit?

1. Download the toolkit of your choice using the links below.
2. Unzip the file and click on click on the green Android icon.
3. Enter your phone into bootloader mode: First power off your tablet and make sure it's unplugged then,press the volume up, volume down, and power button all at the same time. When your phone vibrates let go of the power button, but keep holding onto the volume up and down button. You will now see a green start screen.

 4. Follow directions on the screen.

One-Click Root Toolkit
One-Click TeamWin Recovery Toolkit
One-Click Unroot/Stock Toolkit
One-Click Unlock Bootloader Toolkit
One-Click Lock Bootloader Toolkit

Thursday, September 19, 2013

[HOW-TO] - Return Back to Nexus 7 LTE (2013) Factory Images [Link Available]

If you happen to be in possession of the Nexus 7 that sports LTE connectivity, we have some good news for you. You are now able to restore your tablet in a safe manner, returning it to the factory firmware through the use of freshly released official images from Google.

The images for the Nexus 7 with LTE connectivity have been given the codename “razorg”, and it has already been put up on the Google Developers site.

This would mean those Nexus 7 with LTE owners who did spend a fair amount of time tinkering with their devices and who knows, ruining it, now have a way to return their respective devices to stock Android 4.3 Jelly Bean, build JLS36C, without losing any sleep.


Sunday, September 15, 2013

Price Nexus 7 (2013) - RM1,299 for the 32GB 3G/LTE/WiFi version (Malaysia)

ASUS Malaysia has finally released the Nexus 7 for 2013 price in their September/October product catalog. The 7″ tablet with pure Android experience is priced at RM999 for the 16GB WiFi version and RM1,299 for the 32GB 3G/LTE/WiFi version.


Friday, August 30, 2013

Review - One of the Best Android Launcher - Buzz Launcher


Buzz Launcher is the new concept launcher that enables you to apply shared Homescreens to your own smartphone. With Buzz Launcher, you can freely download, apply, customize, share, and even create Homescreens!

Download Homescreens best suited for your taste, innovate your smartphone, and share your awesome Homescreen layouts with others! Buzz Launcher Homescreens are extremely easy to apply instantly! Friends all around the world are excited to check out the most stunning Homescreens on the planet!

• 60,000+ beautiful and unique Homescreens available via Homepack Buzz
• Personalized Homescreen customization with robust icon and wallpaper editing
• Very simple – Homescreens downloaded and implemented within 5 seconds
• Multiple social features and Homescreen sharing to Facebook, Twitter and Google+ via one-touch upload
• Compatible with Minimalist Text, Zooper Widget Pro, Ultimate custom widget and Battery Widget Z • Unique widget features - clock, date, battery widgets, and “Create My Own Widget” provided via Buzz Custom Widget.

Monday, April 29, 2013

Latest 2013 Nexus 7 Release Date in Malaysia

If 2012 Nexus 7 model is use as the basis, we would expect that the new Nexus 7 will be launch during the Google I/O 2013.

Here's my prediction:
Google I/O 2012 is June 27-29, 2012 vs Google I/O 2013 is May 15-17, 2013 (42 days earlier)
July 13, 2012 release in Australia and US vs June 1, 2013 (?)
Sept. 21, 2012 release in Malaysia vs Aug. 9, 2013 (?)

So, if the calculation is correct, it might be as early as the first week of August 2013.

What do you think?


Wednesday, February 27, 2013

[Received] - TagsForDroid NFC Tags & Key Chain

Ordered on Feb 19 and arrived today (Feb 27). About 8 days. Quite fast.
Tomorrow will experiment with the Tags.

The Bill


Thursday, February 21, 2013

Bugdroid - A Great Story to Tell

I received my first Bugdroid from DX.com but found that it was defect with an antenna fell off. I posted a photo to Google+ Android Collectible Community. Someone pointed out that it was a fake Bugdroid from Series 1. I bought at USD 4.90 but the actual market price for the original now (it was collector item) cost about USD 80-100.
Someone willing to sell his Series 1 item (similar like the fake one) with a starting price of USD 120. Another person responded that he is willing to pay for USD 200 if its legit.
The topic became a hot one and another person bid for USD 500! That's it!
I was quite surprised when I woke up this morning to find out that the simple photo topic became a hot discussion and a lucky guy managed to sell his collection at USD 500! Kudos!


Saturday, February 16, 2013

CUSTOM ROM CM 10.1 with Android 4.2.2 for Nexus 4

It took about 5 minutes to complete this flashing using ROM Manager.


CM 10.1 Nightly Feb. 15, 2013 Supports Android 4.2.2 (Nexus 4)

After a couple of days, CM 10.1 released its Feb. 15, 2013 Nightly with the Android 4.2.2.


See how to update to Android 4.2.2 using CM 10.1 -> Click HERE.

Thursday, February 14, 2013

[How-To] - LG Nexus 4 - Android 4.2.2 Jelly Bean Update.


The Android 4.2.2 Jelly Bean update is a 52MB file. So you can downloaded directly from Google since it isn't available via OTA at the moment. You can reach here for manual update to Android 4.2.2.

CM 10.1 for Nexus 4 to get 4.2.2 Update

CyanogenMod tweeted today...


And here's his full post at G+

This update is deceptively large in the change department, but still manageable. We are working on the same principle as with the update from 4.1 to 4.2, and are working in 'mr1.1-staging' in our github. 

There are quite a few conflicts, which are to be expected as we are more than just a bare AOSP OS, but these will have to be sorted before we start issuing releases based on the 4.2.2 code base. 

Key items:

# Lots of translation conflicts. 
# There don't appear to be new device repos nor any communication on the usual mailing lists regarding this. Even updated kernel source appears to be missing. 
# Some major changes to hardware/qcom/display, which will affect most devices using that. Degree of the impact varies, but this seems to revolve around the new 4-layer composition. 

Please don't bug your various maintainers asking 'when?'. These things take time to do properly and rarely apply cleanly. Good work takes effort, and effort takes time. 


[Nexus 4] - GUIDES, TUTORIALS, HOW-TO'S


Android Governors Explained
by richteralan

[GUIDE] Building CM10.1 with Mac OS X Mountain Lion
by inffy

[Guide] Building from sources [Kernel only for now]
by cdesai

[GUIDE]Unlocking the Bootloader
by TheDarkDefender

How To Build CM10.1 [LINUX]
by Imperticus

[HOW TO]Build Nexus 4 Kernel
by yduck

[HOW TO]Fix Internal Storage If 16GB Now Shows 8GB
by El Daddy

[HOW-TO] How to flash a factory image / return to stock / unlock / root #
by efrant

How To Mount Nexus 4 in Linux
by marty331

How to Root Nexus 4! [Windows + Mac][Video]
by techfanatic9

[ROOT][CONFIRMED WORKING] Root Nexus 4 Using Insecure Boot Image and ADB
by HQRaja

Superboot - Nexus 4 boot solution
by paulobrien

Ultimate Nexus 4 Root Guide
by Jubakuba

Source: XDA

Tuesday, January 29, 2013

[How-To] - Protect root after an OTA

If you apply the OTA to a rooted stock ROM, you will lose root every time. In order yo keep root after an OTA, use something like OTA Rootkeeper (available in Play Store) or just reflash the root zip in custom recovery after flashing the OTA.

ShareThis

LinkWithin

Related Posts Plugin for WordPress, Blogger...