
- Yesterday, Apple released iOS 4.3.1 for iPhone 4, 3GS, iPad 2, iPad, and iPod touch 4G/3G.
- If you “accidentally” upgraded to iOS 4.3.1, and now you want to downgrade back to iOS 4.3, iOS 4.2.1 or 4.1, simply follow the instructions posted below to downgrade iOS 4.3.1 on iPhone 4, 3GS, iPod touch, iPad 2 and iPad 1 to iOS 4.3, iOS 4.2.1, 4.1, 4.0.x.
This process is only for those who have already saved the ECIDs with SHSH to Cydia Server for iOS 4.1, iOS 4.0.1 or iOS 4.0.2 (You must have done/saved this before the release of iOS 4.2.)
Disclaimer:
This guide is for information and educational purposes only. Use it at your own risk, we cannot be held responsible if anything goes wrong.
Downgrade iOS 4.3.1 To 4.3, 4.2.1, 4.1 on iPhone, iPad And iPod Touch:
Step 1:
- Download the required old ipsw firmware files.
- (Download links: iOS 4.3, iOS 4.2.1, iOS 4.1, iOS 4.0.2, iOS 4.0.1)
Put your device into DFU mode (not recovery mode).
- Connect your iOS device to your computer.
- Turn it off.
- Start iTunes.
- Hold Power and Home buttons together for 10 seconds or so.
- Release Power button but keep holding the Home button until your computer recognizes a new USB device.
- iTunes will now recognize your iPhone, iPad or iPod touch.
Step 3:
- Navigate to the path “c:\windows\system32\drivers\etc\” and open the hosts file in a Notepad or Wordpad.
- MAC users can navigate to the path “/etc/” and open the hosts file with TextEdit.
Windows users
- Open Notepad with admin privileges, then right click on the icon of notepad and click on “Open as administrator”
- Now that the Notepad is open Go to folder C:/WINDOWS/system32/drivers/etc and open the file.
- Add the following line at the end of the document and save it: 74.208.105.171 gs.apple.com
- Navigate to Go -> Go To Folder and enter the path /etc
- Open the file hosts with TextEdit, add the following string 74.208.105.171 gs.apple.com and save the file to your desktop.
- Now return to the previous folder by following the same method and copy the text within this file by replacing the original file (If prompted for a password enter it and click OK)
NOTE: For Windows 7 and Vista: Start “Notepad” with Administrator privileges by right clicking on “Notepad” app, and click on “Run as Administrator“ option.
NOTE: For Mac OS X: Make sure you have full read and write access on your account when you are saving the host file. If it still throws permission error, simply copy the host file to desktop, make the required changes, and then replace it with the original file in “/etc/” directory.
Step 4:
- Start iTunes, click on your iOS device icon from the sidebar in iTunes.
- Now press and hold left “alt” (option) button on Mac, or Left “Shift” button if you are on Windows on the keyboard and then click on “Restore” (Not “Update” or “Check for Update”) button in the iTunes and then release this button.
- This will make iTunes prompt you to select the location for your iOS 4.3, iOS 4.2.1 or 4.1 firmware file.
- Select the desired ipsw file and click on “Open” to restore your iOS device.
- Now sit back and enjoy as iTunes does the rest for you.
- This will involve a series of automated steps. Be patient at this stage and don’t do anything silly.
- Just wait while iTunes installs the requested firmware on your iOS device.
- Your device screen at this point will be showing a progress bar indicating installation progress.
- Once done, it will reboot automatically.
- Now in some cases while restoring to iOS 4.3, iOS 4.2.1 or 4.1, iTunes might throw 1013 error at you as shown in the screenshot below. This is normal, just ignore this error as the firmware has already been successfully installed on the device

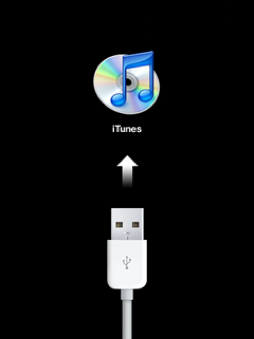
- Incase of the above mentioned error, your iPhone, iPad or iPod touch will be stuck in Recovery Mode, showing that “Connect to iTunes” screen.
- To exit your device from Recovery Mode, download this program called TinyUmbrella (Windows/Mac). Run it and the click on “Exit Recovery” button. Your device will now restart normally.

- That’s it! You successfully downgraded iOS 4.3.1 to iOS 4.3 iOS 4.2.1, 4.1, 4.02, 4.01 firmware. You can follow the normal guides to jailbreak firmware iOS 4.2.1, iOS 4.1, iOS 4.0.2 or 4.0.1.
- Last but not the least, you must now remove 74.208.105.171 gs.apple.com line from the host file so that you are prompted for future updates from Apple via iTunes.
No comments:
Post a Comment