Konova

Sunday, November 24, 2013

[Kickstarter Backer] - LIMA - The brain of your devices.

I have pledged for this Kickstarter project on 17th August 2013.
Expected arrival - April 2014 (That's a long time. Hope I don't forget).


Pledge Summary

AMOUNT PLEDGED

$79.00

REWARD

CLASSIC (second batch): You get one of the first Lima devices, in black. This device will retail for $150 after this Kickstarter campaign. ($10 shipping included)

ESTIMATED DELIVERY

Apr 2014 

[Purchased] - Everdock Duo (Gold) - Ordered Oct. 20, 2013

Subtotal  : $69.00 USD
Shipping  : $20.00 USD

Total     : $89.00 USD

The EverDock Duo is designed to support virtually any combination of smartphones and tablets. Accommodating lightning, 30-pin, and micro-USB connectors, the EverDock Duo works with smartphones and tablets from Apple, Samsung, HTC, Motorola, Nokia, LG, BlackBerry and others.
The EverDock Duo comes with two micro-USB cables, three cable adapters and a set of black, removable silicone protectors. The EverDock is compatible with Apple's Lightning and 30-pin cables.

Expected to deliver in December, 2013.
Click here --> Everdock Facebook

Thursday, November 21, 2013

[Purchased] - iPad Air from Power Buy, Bangkok

Bought from Power Buy Central World, Bangkok on 19 Nov. 2013.
Simply can't wait when they will launch in Malaysia.


Samsung Chromebook

Managed to win a prize on the last Quiz - in fact the last person at WIF KL 2013.
Its a Samsung Chromebook sponsored by YES 4G!


As a power user, I don't think I will be using this as my main computer. It can't even install any apps. All are web browser apps from Google.

The idea is to save the data in the cloud. Its cheap and fast to boot up.

Wednesday, November 20, 2013

Friday, November 15, 2013

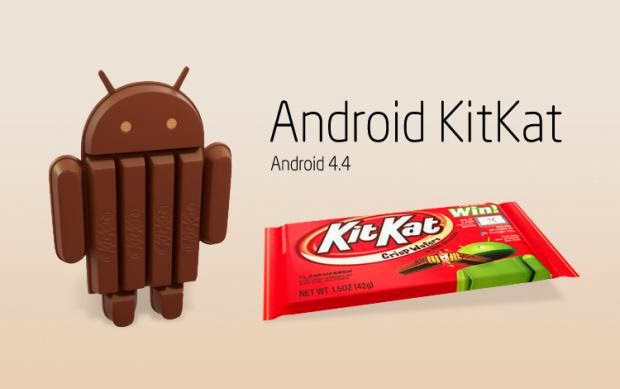
[HOW-TO] - Update Manually Nexus 7 (2013) with Android 4.4 KitKat

If people decided not to wait for OTA. Copy the update zip to virtual sdcard, then boot to recovery (TWRP), choose Install, select the zip file, then swipe to install. Also, prior to reboot you need to install SuperSU 1.69 to preserve root and TWRP recovery.


Wednesday, November 13, 2013

[Purchased] - B1X Bumper Full Set for iPhone 5S

Purchased at Machines KLCC
Proce: RM 99.00
Color: Champagne Gold for my gold colored iPhone 5S.
Complete set with Screen Protector Front and Gear


[HOW-TO] - Install CyanogenMod The Easy Way Using CyanogenMod Installer (Now Available in the Play Store)

Here's a simple way to install CyanogenMod onto your device.
The article below is taken from here.


The vast majority of our readers are more than capable of manually unlocking, rooting, and installing a custom ROM. In fact, most of us here prefer doing things the old fashioned way. After all, the fun’s in the journey, not the destination. However, the same certainly cannot be said for the general population. With that in mind, the CyanogenMod team created the CyanogenMod Installer. This serves as the fastest and most streamlined way of installing CM onto your device, without much user effort required.
The installer comes in the form of two parts. The first is a phone client that is available on Google Play. The second is a connected desktop client that is installed on any computer running Windows Vista or later. Naturally, you also need to have a USB cable and have USB debugging enabled.
Importantly, root is not required to get started. Further, your bootloader doesn’t even have to be unlocked to use the desktop client. Rather, the installer unlocks and roots your device for you. There shouldn’t be any issues if you’re running a custom ROM either, as long as the installer can correctly identify your device.
Unfortunately, restoring back to stock is still a manual affair. That said, most users reading this will already be more than capable of running a Nandroid restore themselves. Finally, the CM Installer is currently compatible with the Nexus SGalaxy NexusNexus 7Nexus 7 (2013)Nexus 4Nexus 10,Galaxy S IIGalaxy S IIIGalaxy S 4Galaxy NoteGalaxy Note IIHTC One, and various variants of the above devices.
If you’ve been looking for an easy way to get CyanogenMod onto your device, it doesn’t get any easier than the CM Installer. Make your way to their Play Store entry and Installer Wiki Entry to get started.

Saturday, November 9, 2013

iPad Air Malaysia Release Date Nov. 22, 2013

A "little bird" told me yesterday that the telco will be selling the iPad Air within the next 1 or 2 weeks. I would expect the date would be Nov. 22, 2013.

Get ready guys!


Malaysian Telcos iPhone 5S Packages - Comparison Chart


Tuesday, November 5, 2013

[HOW-TO] - Turn Off Audible Notifications from New Email

If this is for your gmail account do the following:
  • Open Gmail
  • Hit the menu button and select settings
  • Tap the account you want to turn notifications off for
  • Tap on Ringtone & Vibrate ("Sound & vibrate" after Gmail updates")
  • Tap on Ringtone and select Silent, then tap OK
  • Hit the back button until it takes you back to your inbox. No more audible notifications


Monday, November 4, 2013

[HOW-TO] - Update and Install Android 4.4 KitKat on your Google Nexus 7 (2013)


Preparatory Steps
  • Ensure that you have the original USB cable for your Nexus 7 (2013). However, a duplicate might also work
  • Charge your device to at least 85% so it doesn’t turn off during the Android 4.4 installation
  • Enable USB debugging on your Nexus 7 (2013) by going to Settings > Developer Options > USB debugging
  • Make sure you have all the USB drivers installed on your computer to support your device
  • After you’ve completed all the prepatory steps, make the following downloads

Downloads

Steps to Install Android 4.4 KitKat on Google Nexus 7 (2013) (CWM Recovery method)

Step 1 - After you’ve downloaded the above listed zip files, connect your computer to your  Nexus 7  and move both the zip files to your phone’s root storage (in plain sight, not in any folder)
Step 2 - Now disconnect your device and boot it into recovery mode by first turning it off and then on again by pressing Volume Up + Volume Down + Power buttons together
Step 3 - Now that you’re in CWM recovery, select Data Wipeout / Factory reset option and wipe the data. Next, select the Wipe Cache and then Dalvik cache from the Advanced Option
Step 4 - Now go back to the recovery menu and select the Install Zip from SD Card option. Now choose the Android 4.4 AOSP zip file and install it. After that completes, do the same for the GApps zip file and install it.
Step 5 - After that’s done, select the +++Go Back++++ option and click on Reboot system now 

Steps to Install Android 4.4 KitKat on Google Nexus 7 (2013) (TWRP Recovery method)

Step 1 - After you’ve downloaded the above listed zip files, connect your computer to your nexus 7 (2013) and move both the zip files to your phone’s root storage (in plain sight, not in any folder)
Step 2 - You may now disconnect your device and boot it into recovery mode by first turning it off and then on again by pressing Volume Up + Volume Down + Power buttons together
Step 3 - Now that you’re in CWM recovery, select Data Wipeout option and wipe the data. Next, select the Wipe Cache and then Dalvik cache from the Advanced Option
Step 4 - Now go back to the recovery menu and select the Install option. Now choose the Android 4.4 AOSP ROM zip file and install it. After that completes, do the same for the GApps zip file and install it.
Step 5 - After that’s done, go back to the recovery menu and click on Reboot 
You have now successfully updated your device to the latest Android 4.4 KitKat firmware. 
Source: Droidcave.

ShareThis

LinkWithin

Related Posts Plugin for WordPress, Blogger...